Google Search Console is a free tool from Google that shows how your site performs in Google Search and whether Google can find, crawl and index your pages. If you run a new blog, it is the first tool to set up, because it tells you straight from Google when something is wrong.
This guide shows you how to set up Google Search Console on a WordPress site that uses Rank Math, submit your sitemap and fix the indexing problems that new sites run into most often.
What is Google Search Console and why does a new blog need it?
Most SEO tools estimate how your site is doing. Search Console is different, because the data comes from Google itself: the searches that show your pages, the clicks you receive, the pages Google has indexed and any warnings about security or penalties.
For a new blog it does three important jobs:
- Checks indexing. It tells you which pages are in Google and which are not, and often explains why.
- Shows real search data. You see the queries that bring impressions and clicks, which feeds your keyword research.
- Sends alerts. If Google finds a serious problem, such as a manual action or a hacked page, it appears here.
What does ‘indexing’ mean?
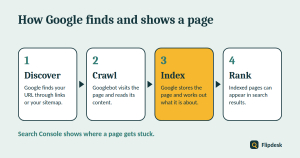
Before a page can appear in search results, Google has to go through four stages: it discovers the URL, crawls the page, indexes it and then decides where to rank it. A page can get stuck at any stage, and Search Console is how you find out where.
Keep one point in mind: being indexed does not mean ranking well. But a page that is not indexed has no chance of appearing at all, which is why indexing is the first thing to check on a new site.
What you need before you start
- A Google account
- Admin access to your WordPress dashboard
- Rank Math SEO installed (the free version is enough), because it creates your sitemap automatically
There is one more check that takes ten seconds. In WordPress, go to Settings > Reading and make sure ‘Discourage search engines from indexing this site’ is not ticked. This box is one of the most common reasons a new WordPress site never appears in Google.
Step 1: Choose your property type
In Search Console, a ‘property’ is the site you want to manage. When you add one, Google asks you to choose between two types.
Domain property
A domain property covers every version of your site in one view: http and https, www and non-www, and all subdomains. It can only be verified with a DNS record.
URL-prefix property
A URL-prefix property covers only the exact address you enter, such as https://www.example.com/. It offers several verification methods, including an HTML tag, which is the simplest option on WordPress.
| Domain property | URL-prefix property | |
|---|---|---|
| What it covers | All protocols and subdomains | One exact address only |
| Verification | DNS record | HTML tag, HTML file, DNS and others |
| Best for | The most complete view of your site | The quickest setup on WordPress |
| Watch out | You need access to your DNS settings | You must enter the address exactly as it loads in your browser |
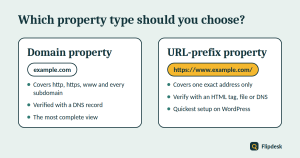
Which should you choose? If you can edit DNS records at your domain registrar or hosting company, a domain property gives you the most complete picture. If you cannot, or you want the quickest route, use a URL-prefix property. You can also add both.
Step 2: Verify that you own the site
Verification proves to Google that you are allowed to see the site’s data. You only need one of the methods below.
Method A: HTML tag with Rank Math (easiest for WordPress)
Copy the verification code
In Search Console, add a URL-prefix property and type your address exactly as it loads in your browser, including https://. Click Continue, open the ‘HTML tag’ option and copy the code. You need the long string of letters and numbers inside the tag.
Paste it into Rank Math
In WordPress, go to Rank Math SEO > General Settings > Webmaster Tools. Paste the code into the Google Search Console field and click Save Changes.
Finish verification
Go back to Search Console and click Verify. If it fails, clear your site cache and try again, because a cached page may not show the new tag yet.
Method B: DNS record
This is the method for a domain property. Google gives you a TXT record to add in your DNS settings, which you can find at your domain registrar or your hosting company. DNS changes can take anywhere from a few minutes to several hours, so if verification fails at first, wait a while and click Verify again.
Method C: HTML file upload
Google gives you a small HTML file. Upload it to the root folder of your site using your hosting File Manager or FTP, so that it loads at yoursite.com/filename.html, then click Verify.
Pro tip: Once you are verified, do not delete the tag, DNS record or file. Google checks from time to time, and if the method disappears you can lose access to your data.
Step 3: Submit your sitemap
A sitemap is a file that lists the pages you want Google to find. Submitting it helps Google discover your content, but it does not guarantee that every page will be indexed.
Find your Rank Math sitemap
Rank Math creates your sitemap automatically. It is usually at yoursite.com/sitemap_index.xml. Open that address in your browser to confirm it loads. If you see a 404 error, check that the sitemap is switched on under Rank Math SEO > Sitemap Settings, then go to Settings > Permalinks and click Save Changes without altering anything.
Submit it in Search Console
In the left-hand menu, click Sitemaps. Under ‘Add a new sitemap’, enter sitemap_index.xml and click Submit.
Check the sitemap status
A status of ‘Success’ means Google could read the file. ‘Couldn’t fetch’ can be a temporary problem, so wait a day and try again. If it keeps failing, check that the sitemap address opens in your browser and that a security plugin is not blocking it.
Keep low-value pages, such as tag archives, out of your sitemap. You want Google to spend its time on the pages that matter.
Step 4: Check whether your pages are indexed
Use the URL Inspection tool
Paste the full address of a page into the search bar at the top of Search Console. You will see one of two results. ‘URL is on Google’ means the page is indexed. ‘URL is not on Google’ means it is not, and Search Console usually gives a reason. The Test live URL button shows how Google fetches the page right now.
Request indexing for new articles
If a page is not on Google, click Request indexing. This asks Google to look at the page sooner, but it is not a guarantee, and sending the same request again and again does not speed anything up. There is also a daily quota, so save requests for important pages such as new articles and major updates.
Read the Page indexing report
Go to Indexing > Pages. This report splits your pages into ‘Indexed’ and ‘Not indexed’, and lists the reasons why pages are not indexed. Click any reason to see the affected URLs.
Not every ‘not indexed’ reason is a problem. Redirects, alternate pages with a correct canonical tag, and pages you deliberately set to noindex are all normal.
Step 5: Fix common indexing issues
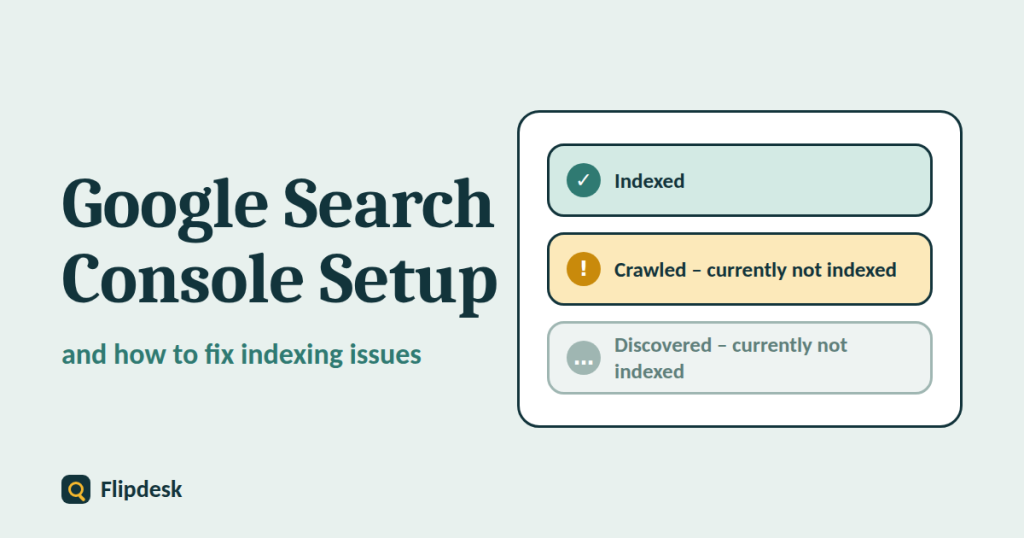
Here is a quick summary of the statuses new blogs see most often. Detailed fixes follow below.
| Status | What it usually means | First thing to try |
|---|---|---|
| Crawled – currently not indexed | Google read the page but chose not to index it for now | Improve depth and originality, add internal links |
| Discovered – currently not indexed | Google knows the URL but has not crawled it yet | Add internal links and wait |
| Excluded by ‘noindex’ tag | The page tells Google not to index it | Remove the noindex tag if it is unintended |
| Blocked by robots.txt | Google is not allowed to crawl the page | Edit the robots.txt rule |
| Duplicate or alternate canonical | Google picked another URL as the main version | Set a clear canonical and remove duplicates |
| Not found (404) or soft 404 | The page is missing, or looks empty | Restore it, redirect it or add real content |
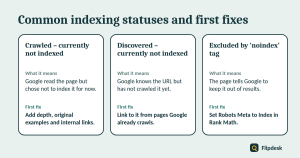
Crawled – currently not indexed
What it means
Google fetched the page but decided not to add it to its index, at least for now. On a new blog this usually points to content that is thin, repetitive or similar to what already exists, or to a site Google does not trust yet.
How to fix it
- Make the page genuinely useful. Add original examples, your own screenshots and a full answer to what the reader is searching for. Our guide to keyword research for a new blog explains how to check search intent.
- Link to the page from related articles and from its category page.
- Merge or remove near-duplicate pages.
- After a meaningful update, inspect the URL again and request indexing once.
Discovered – currently not indexed
What it means
Google knows the URL exists, usually from your sitemap or a link, but has not crawled it yet. This is common on brand-new sites with few links and little history.
How to fix it
- Add internal links to the page from your homepage, category pages and older articles that Google already crawls.
- Make sure your sitemap lists only pages you want indexed.
- Check that your hosting is fast and not returning errors, because a slow or unreliable server can slow crawling.
- Be patient, and keep publishing quality articles.
Excluded by ‘noindex’ tag
A noindex tag tells Google to keep the page out of search results. That is fine for pages like thank-you pages, but not for your articles. Check Settings > Reading in WordPress for the site-wide setting, then open the page and look in the Rank Math Advanced tab, where Robots Meta should be set to Index. After fixing it, inspect the URL again and request indexing.
Blocked by robots.txt
Your robots.txt file tells crawlers which areas of the site to avoid. A rule such as Disallow: / blocks the whole site. Open yoursite.com/robots.txt to read it, and check the robots.txt report under Settings in Search Console. In Rank Math you can edit the file under General Settings > Edit robots.txt. Remove any rule that blocks pages you want in Google.
Duplicate pages and canonical problems
Statuses such as ‘Duplicate without user-selected canonical’ mean Google found similar pages and picked one as the main version. To fix this, make sure each page has one clear address, use a single version of your site (https and either www or non-www), redirect the old versions, and check the canonical URL in the Rank Math Advanced tab.
Not found (404) and soft 404
A 404 means the address does not exist. That is fine if you removed the page on purpose. If the page should exist, restore it or add a 301 redirect to the closest relevant page. A soft 404 means the page loads but looks empty or like an error page, so Google treats it as missing. Add real content, or make the server return the correct status code.
After you fix an issue
Open the issue in the Page indexing report and click Validate fix. Google will recheck the affected pages, which can take days or even weeks. For a single page, use the URL Inspection tool and request indexing.
Step 6: Learn the Search Console reports that matter
Performance report
Open Performance > Search results to see how your site appears in Google. The four main numbers are:
- Clicks: how many times people clicked through to your site
- Impressions: how many times your pages appeared in results
- CTR: clicks divided by impressions
- Average position: your typical ranking position for the selected queries
Open the Queries tab to see which searches show your pages. These are an excellent source of new article ideas. Data can take a few days to begin appearing after you verify your site.
Manual actions and Security issues
If Google applies a manual action or finds malware on your site, it is reported under Security & Manual Actions. A healthy new blog should show no issues. Check it if your traffic suddenly drops, and read our guide on how to check whether a domain has a Google penalty.
Core Web Vitals and HTTPS
The Experience section shows speed and security data for your pages. A new site often shows ‘not enough data’ for Core Web Vitals, which is normal. Make sure the HTTPS report shows your pages as secure.
How long does indexing take?
There is no fixed answer. For a new site, a few days to a few weeks is common, and some pages may take longer. Google may also decide that some pages are not worth indexing. The best way to help is to publish useful content, link your articles together and keep your sitemap clean.
Common Search Console mistakes
- Entering the property address differently from how the site loads, such as http instead of https
- Deleting the verification method after verifying
- Requesting indexing for every page every day
- Leaving the ‘Discourage search engines’ box ticked in WordPress
- Putting thin or low-value pages in the sitemap
- Panicking over ‘not indexed’ pages that are meant to be excluded
Search Console setup checklist
- Untick ‘Discourage search engines from indexing this site’ in WordPress
- Add a property and verify it
- Submit sitemap_index.xml
- Inspect your homepage and your three most important articles
- Request indexing for any important page that is not on Google
- Review the Page indexing report once a week
- Check Performance for new keyword ideas
- Check Manual actions and Security issues if traffic drops
Frequently asked questions
Is Google Search Console free?
Yes. It is completely free to use.
Do I need Google Analytics to use Search Console?
No. They are separate tools. Search Console shows how people find your site in Google and whether your pages are indexed. Analytics shows what visitors do once they arrive.
How long does it take for data to appear in Search Console?
It can take a few days after you verify your site before the first data shows up.
Should I request indexing for every page?
No. Use it for important new or updated pages. Your sitemap and internal links help Google find the rest.
Why does Search Console say ‘URL is not on Google’?
The page has not been indexed yet. Open the inspection result to see the reason. On a new site, many pages simply need time.
Can I force Google to index a page?
No. You can make it easier by adding internal links, keeping a clean sitemap and improving the content, but only Google decides what to index.
Does Search Console improve my rankings?
Not directly. It does not change your rankings, but it gives you the data and warnings you need to fix problems and improve your content.
Conclusion
Setting up Google Search Console takes less than an hour, and it gives you a direct line to what Google sees on your site. Add and verify your property, submit your sitemap, then inspect your homepage and your most important articles.
Once your pages are indexed, the next job is to make each one worth ranking, which our on-page SEO checklist for beginners covers step by step.